In a reliable full bleed business card cutting workflow, the bleed area extends beyond the intended trim line so the finished card shows color or imagery directly against every edge. The effect looks simple, but it leaves little room for variation between artwork, printing, feeding and cutting. White edges on business cards are therefore not proof that the cutter is inaccurate; they are symptoms that must be traced through the complete workflow.
Anyone learning how to cut full bleed business cards should treat the job as a print-to-cut alignment process rather than a cutter-only task. An automatic business card cutting machine can repeat a validated print imposition, but it cannot repair missing bleed, incorrect scaling or unstable paper feeding. The checks below connect business card bleed and trim, crop marks, registration marks, automatic sheet feeding and the final cutting layout.
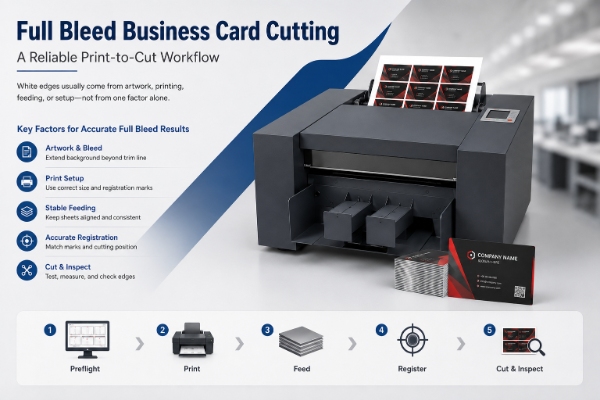
Diagnose Full Bleed Business Card Cutting Problems
| Symptom | Inspect first |
|---|
| White appears on all four edges | Artwork bleed, export settings, print imposition and crop marks |
| White appears on one consistent edge | Printed image position, finished card size and print-to-cut alignment |
| Margin changes from sheet to sheet | Automatic sheet feeding, feed consistency, paper curl, static and registration marks |
| Entire batch is shifted in one direction | Print placement, selected cutting template and image-shift compensation |
| Error grows across the sheet | Sheet scaling, sheet skew, trim accuracy and actual sheet dimensions |
Do not adjust several variables at once. A controlled test is faster than repeatedly changing the file, printer and cutter settings together.
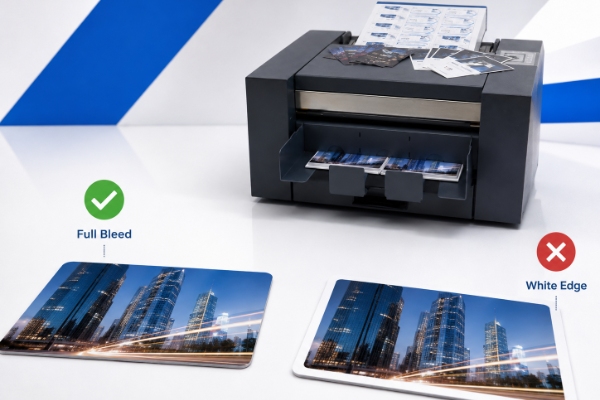
Why Full Bleed Makes Small Variations Visible
A white card with a centered logo can hide a small shift because the unprinted border is part of the design. Edge-to-edge printing cannot. When the trim line passes through a solid background, movement that carries the cut outside the printed image exposes the paper underneath. Dark backgrounds, narrow decorative frames and opposite-color front and back artwork make the effect especially visible.
The variation can be cumulative. The business card bleed may be narrow; the printer may scale or reposition the page; sheet skew may alter the feed angle; and the cutter may use a layout that does not match the imposition. Each change may be small, but together they explain why business card margins are uneven or a white strip appears after trimming. This is a common cause of uneven business card margins. Start upstream rather than immediately increasing cutter compensation.
Use several consecutive printed sheets and mark their feed direction. Compare the same card position on every sheet and different positions across one sheet. A repeatable error usually indicates a systematic file, print or setup issue. Sheet-to-sheet variation suggests printing or feeding. An error that grows from left to right or leading to trailing edge suggests scaling or skew.
Business Card Bleed and Trim: Safe Area and Gutter
Bleed creates a bleed area by extending the background beyond the finished trim line. Safe area keeps essential text and logos away from that line. Gutter is the planned space between imposed cards and must support the selected cutting layout. The correct values depend on the printer specification, customer requirement, imposed template and cutter configuration; there is no universal dimension that fits every job.
Before production, confirm that the exported PDF still contains the intended bleed and that the imposed artwork matches the cutter template. A reliable business card cutting setup keeps the PDF page size, print imposition, gutter and selected cutting layout consistent. A background that stops at the trim line cannot be repaired by registration. Likewise, enlarging the artwork is not a substitute for verifying the finished card size and gutter.
Preflight the Business Card Bleed
Check the final production PDF, not only the design file. Confirm that backgrounds extend beyond every intended trim edge, critical text remains within the agreed safe area, and the gutter is compatible with the imposition and cutting cassette. For duplex work, verify front and back orientation independently.
Confirm that the PDF page size, imposed sheet size and printer setup agree. Check whether crop marks or registration marks overlap artwork, fall outside the printable area or conflict with the cutter-reading method. For variable-data jobs, inspect several records because a shifted frame, missing background or unusually long text may affect only certain cards.
A practical preflight record includes finished dimensions, imposed dimensions, the printer-supplied bleed requirement, safe area, gutter, front/back orientation and approved cutter template. These values are job-specific; there is no responsible universal bleed value for every printer and configuration.
Separate File Error from Print Shift
Print one reference sheet and measure the image position against the physical edges. Then print several more sheets without changing the file. If every sheet shows the same offset, inspect the layout, printer scaling and template selection. If the offset changes between sheets, examine printer repeatability, paper condition and feeding.
Disable unintended “fit to page” or scaling options. Confirm the actual sheet size instead of relying only on its nominal name. Paper curl and dimensional change can also appear after printing or environmental exposure. These differences matter when narrow borders make small shifts visible.
Check automatic centering, image-position correction, duplex registration, print scaling and media-profile settings. A correction that improves one side can change the other. Compare the digital page size with both the physical sheet and printed image. For duplex work, inspect each side independently.
Also inspect the uncut print for an unprinted band or weak ink/toner coverage. If the background already stops before the intended trim area, no business card cutting registration setting can restore it. Keep one uncut reference sheet from every investigation.
Automatic Sheet Feeding and Registration Checks
Fan and align the stack according to the model manual. Remove damaged, curled or statically charged sheets and avoid mixing noticeably different stocks in one test. Keep feed rollers and the registration-reading area clean using only approved methods.
On supported Vicut card-cutter configurations, front-edge detection or registration marks can support print-to-cut alignment and control the cutting position. Registration can compensate for certain placement shifts, but it cannot replace missing bleed, correct severe scaling or make an unsuitable sheet feed consistently. Marks must remain readable and match the selected workflow.
Front-edge detection establishes position from the physical sheet edge and therefore depends on a stable relationship between print and paper. Registration marks provide printed references that supported equipment can read. If the entire image and marks move together, registration may compensate for part of that image shift. If the image is scaled, distorted or moves independently of the marks, the file or printing stage must be corrected.
For business card print and cut alignment, test the exact mark type, location, contrast and template required by the model and software. Do not assume that a mark set created for another cutter is compatible.
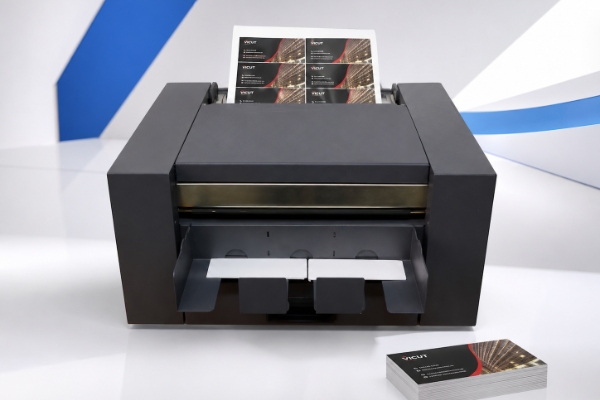
Business Card Cutting Machine: Cassette, Blade and Compensation Settings
For automatic business card cutting, the CC-220, CC-330 and CC-330S use longitudinal slitting with a cutting cassette and a lateral cross-cutting knife. In this automatic business card cutter workflow, the cassette controls longitudinal card width while the lateral cutter controls the cross-cut length. Confirm that the installed cassette matches the intended finished width and that the selected layout matches the printed imposition. Inspect accessible components for debris or damage without dismantling protected assemblies.
If a model provides image-shift compensation, begin from a documented baseline and change one setting at a time. Record the direction and result. Never use undocumented service parameters or assume that a compensation value from another model is transferable.
Troubleshooting Business Card Cutting Registration with a Controlled Test
Save a copy of the production file and record the current settings.
Use one verified layout, one batch of paper and a small numbered test set.
Measure the printed image before cutting.
Cut the first sheet using the documented template.
Compare the leading, trailing, left and right edges.
Change only one variable, then repeat.
Keep the best sample with its settings as a future reference.
This sequence shows whether the variation entered during file preparation, printing, feeding, registration or cutting. Keep the successful values as the approved business card cutting setup for repeat orders.
Check Finished Card Size and Trim Accuracy
Create an inspection sheet with four measurements for selected cards: left, right, top and bottom margins. Include cards from the leading edge, center and trailing edge of the imposed sheet, and record whether the sheet came from the beginning, middle or end of the stack.
This separates three defects that can look similar: the card size is correct but the image is off-center; the image is centered but the finished size is wrong; or both size and position vary between sheets. Each requires a different correction path.
For repeat orders, retain the approved sample with the PDF version, printer preset, paper identification, cutting cassette or layout and any documented compensation. This reference prevents operators from rebuilding a full bleed business card setup from memory.
Full Bleed Business Card Cutting Production Sign-Off
Do not approve a full stack from one good card. Inspect multiple positions on the first sheet, then repeat after continuous feeding has revealed possible changes from stack height, static or curl. For duplex jobs, check front-to-back orientation as well as trim margins.
Agree on visual acceptance before production. A borderless background may tolerate movement that becomes obvious in a design with a thin frame. Quality approval should therefore consider the artwork and customer specification, not only a nominal cutter tolerance.
How to Prevent White Edges on Business Cards
Approve the final size, bleed, safe area and gutter before printing.
Preserve a tested imposition template for repeat orders.
Check printer scaling and actual sheet dimensions.
Condition, align and test the production stock.
Keep the feed path, waste tray and readable registration area clean.
Verify cassette, layout and job settings before loading a full stack.
Retain a signed sample and settings record.
Stop and contact technical support if the machine produces abnormal noise, repeated jams, a persistent error after verified setup, visible component damage or a safety-device warning. Consult the specific user manual before cleaning, replacing tools or accessing internal parts.
FAQ
Q1:What should the bleed be on a business card?
Use the bleed specified by the printer, imposed layout and cutter template. Extend the background beyond every trim edge, but do not assume one fixed bleed value works for every production setup.
Q2:What is a common mistake on business cards?
A common mistake is stopping the background at the trim line. Even a small print or cutting shift can then expose the white paper edge.
Q3:Do you add bleed to print and cut?
Yes. For a full-bleed job, include bleed in the production PDF, print through the bleed area and cut to the final trim size. Bleed does not increase the finished card dimensions.
Q4:What are bleed requirements?
Bleed requirements define how far artwork must extend beyond the trim line. Confirm the required bleed, safe area, gutter, sheet size and cutter layout with the printer and equipment workflow before production.
 vicutcnc@cncvicut.com